在上篇中,通过将NGINX作为oAuth认证授权过程中的Client角色的代理,帮助应用直接实现oAuth认证登录。在这样一个过程中,我们采取的是authorization code的oAuth流程,取的是access_token,没有采用OIDC申请格式,并需要借助一个外部oauth proxy服务,那么是否可以完全依赖NGINX实现呢?
正如前篇文章所分析,在authorization code模式中需要 client 这个角色(就是代表第三方应用的,这里实际可以理解为NGINX)需要能够做以下几个事情:
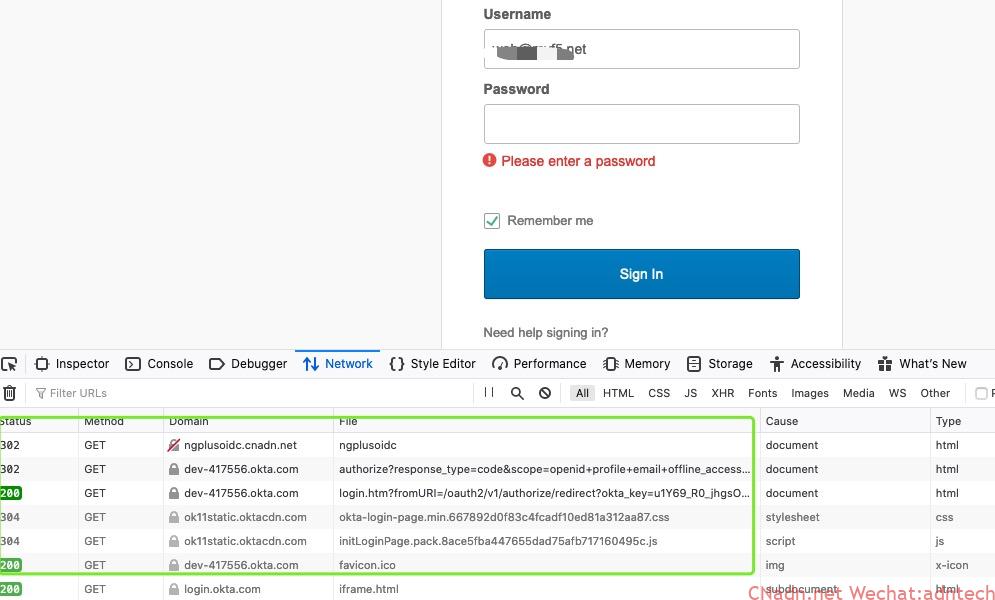
- 收到未登录的用户请求或登录但ID token过期的请求,NGINX要向客户端返回一个302,这个302 location中是构造IdP的验证url
- 用户开始在IdP上登录, IdP返回一个302跳转,location是预先设置的NGINX上的一个回调接口,并附着authorization code,
- NGINX收到该请求,获取code,向IdP发起请求获取access_code以及id token
- NGINX收到IdP的返回后,提取id token,执行有效性验证,如果验证ok,存取到本地和内存KV中,kv中用此次request的的request_id作为key,将id token整个存储在对应的value里
- NGINX发起302跳转给客户端,这里set一个cookie=上面的request_id给客户端
- 客户端发起一个带着cookie=request_id请求到NGINX上,NGINX根据该cookie提取kv里的对应的value,也就是提取到了id token,利用jwt模块执行校验,校验成功则通过,并将id token里的claims作为header送给后端应用
可以看出这个过程需要 njs模块编写javascript来实现子请求操作,使用jwt auth模块执行token验证,还需要keyval模块存储相关toke内容,因此只有NGINX Plus可以实现
Demo
NGINX 配置:
|
1 2 3 4 5 6 7 8 9 10 11 12 13 14 15 16 17 18 19 20 21 22 23 24 25 26 27 28 29 30 31 32 33 34 35 36 37 38 39 40 41 42 43 44 45 46 47 48 49 50 51 52 53 54 55 56 57 58 59 60 61 62 63 64 65 66 67 68 69 70 71 72 73 |
# This is the backend application we are protecting with OpenID Connect upstream my_backend { zone my_backend 64k; server 127.0.0.1:8080; } # Custom log format to include the 'sub' claim in the REMOTE_USER field log_format main_jwt '$remote_addr - $jwt_claim_sub [$time_local] "$request" $status ' '$body_bytes_sent "$http_referer" "$http_user_agent" "$http_x_forwarded_for"'; # JavaScript code for OpenID Connect js_include conf.d/openid_connect.js; js_set $requestid_hash hashRequestId; auth_jwt_claim_set $jwt_audience aud; # In case aud is an array keyval_zone zone=opaque_sessions:1M state=conf.d/opaque_sessions.json timeout=1h; # CHANGE timeout to JWT/exp validity period keyval_zone zone=refresh_tokens:1M state=conf.d/refresh_tokens.json timeout=8h; # CHANGE timeout to refresh validity period keyval $cookie_auth_token $session_jwt zone=opaque_sessions; # Exchange cookie for JWT keyval $cookie_auth_token $refresh_token zone=refresh_tokens; # Exchange cookie for refresh token keyval $request_id $new_session zone=opaque_sessions; # For initial session creation keyval $request_id $new_refresh zone=refresh_tokens; # " map $refresh_token $no_refresh { "" 1; # Before login "-" 1; # After logout default 0; } # JWK Set will be fetched from $oidc_jwks_uri and cached here - ensure writable by nginx user proxy_cache_path /var/cache/nginx/jwk levels=1 keys_zone=jwk:64k max_size=1m; # The frontend server - reverse proxy with OpenID Connect authentication # server { include conf.d/openid_connect.server_conf; # Authorization code flow and Relying Party processing # OpenID Connect Provider (IdP) configuration resolver 114.114.114.114; # For DNS lookup of IdP endpoints; subrequest_output_buffer_size 32k; # To fit a complete tokenset response set $oidc_jwt_keyfile "https://dev-yourid.okta.com/oauth2/default/v1/keys"; # URL when using 'auth_jwt_key_request' set $oidc_logout_redirect "/_logout"; # Where to send browser after requesting /logout location set $oidc_authz_endpoint "https://dev-yourid.okta.com/oauth2/default/v1/authorize"; set $oidc_token_endpoint "https://dev-yourid.okta.com/oauth2/default/v1/token"; set $oidc_client "0oabpppkfsdfsdfsafsdfsdf1PnvdB4x6"; set $oidc_client_secret "pfjqNlOVsfsdfsdfsdfsfsdfdsfdsfp_FBGONZasTAkAxXG"; set $oidc_hmac_key "myf5"; # This should be unique for every NGINX instance/cluster listen 80; # Use SSL/TLS in production server_name ngplusoidc.cnadn.net; location /ngplusoidc { # This site is protected with OpenID Connect # 请求进来会做jwt 认证,这里使用okta的 jwks的uri来动态获取jwk来做验证 auth_jwt "" token=$session_jwt; #auth_jwt_key_file $oidc_jwt_keyfile; # Enable when using filename auth_jwt_key_request /_jwks_uri; # Enable when using URL # Absent/invalid OpenID Connect token will (re)start auth process (including refresh) 认证没通过,就会返回401,就触发去获取id token或者刷新id token error_page 401 = @oidc_auth; # Successfully authenticated users are proxied to the backend, # with 'sub' claim passed as HTTP header proxy_set_header sub $jwt_claim_sub; proxy_set_header email $jwt_claim_email; proxy_set_header name $jwt_claim_name; proxy_pass http://my_backend; # The backend site/app access_log /var/log/nginx/access.log main_jwt; } } |
|
1 2 3 4 5 6 7 8 9 10 11 12 13 14 15 16 17 18 19 20 21 22 23 24 25 26 27 28 29 30 31 32 33 34 35 36 37 38 39 40 41 42 43 44 45 46 47 48 49 50 51 52 53 54 55 56 57 58 59 60 61 62 63 64 65 66 67 68 69 70 71 72 73 74 75 76 77 78 79 80 81 82 83 84 85 86 87 88 89 90 91 92 93 94 95 96 97 98 99 100 101 102 103 104 105 106 107 108 109 110 111 112 113 114 |
location @oidc_auth { if ($no_refresh) { # No refresh token so redirect this request to the OpenID Connect identity provider login # page for this server{} using authorization code flow (nonce sent to IdP is hash of $request_id) add_header Set-Cookie "auth_nonce=$request_id; Path=/; HttpOnly;"; # Random value add_header Set-Cookie "auth_redir=$request_uri; Path=/; HttpOnly;"; # So we know where to come back to # This URL should work for most OpenID Connect providers. # Adjust the scope or state values as required (offline_access enables refresh tokens) return 302 "$oidc_authz_endpoint?response_type=code&scope=openid+profile+email+offline_access&client_id=$oidc_client&state=0&redirect_uri=$scheme://$host:$server_port$redir_location&nonce=$requestid_hash"; } # We have a refresh token so perform refresh operation js_content oidcRefreshRequest; # Catch errors from oidcRefreshRequest() # 500 = token validation error, 502 = error from IdP, 504 = IdP timeout error_page 500 502 504 @oidc_error; access_log /var/log/nginx/oidc_auth.log main; error_log /var/log/nginx/oidc_error.log debug; } location = /_jwks_uri { internal; proxy_cache jwk; # Cache the JWK Set recieved from IdP proxy_cache_valid 200 12h; # How long to consider keys "fresh" proxy_cache_use_stale error timeout updating; # Use old JWK Set if cannot reach IdP proxy_ignore_headers Cache-Control Expires Set-Cookie; # Does not influence caching proxy_method GET; # In case client request was non-GET proxy_pass $oidc_jwt_keyfile; # Expecting to find a URI here } set $redir_location "/_codexch"; location = /_codexch { # This is where the IdP will send the authorization code after user login js_content oidcCodeExchange; # JavaScript function to obtain JWT and issue cookie add_header Set-Cookie "auth_token=$request_id; Path=/; HttpOnly;"; # Catch errors from oidcCodeExchange() # 500 = token validation error, 502 = error from IdP, 504 = IdP timeout error_page 500 502 504 @oidc_error; access_log /var/log/nginx/oidc_auth.log main_jwt; error_log /var/log/nginx/oidc_error.log debug; } location = /_token { ##njs程序执行子请求,这个子请求会命中这个location,用于构造请求到okta去获取授权code # This location is called by oidcCodeExchange(). We use the proxy_ directives # to construct the OpenID Connect token request, as per: # http://openid.net/specs/openid-connect-core-1_0.html#TokenRequest internal; gunzip on; # Decompress if necessary proxy_set_header Content-Type "application/x-www-form-urlencoded"; proxy_method POST; proxy_set_body "grant_type=authorization_code&code=$arg_code&client_id=$oidc_client&client_secret=$oidc_client_secret&redirect_uri=$scheme://$host:$server_port$redir_location"; proxy_pass $oidc_token_endpoint; error_log /var/log/nginx/oidc_error.log debug; } location = /_refresh { ##如果是需要刷新,njs 子请求匹配这个,构造发起refresh token的请求 # This location is called by oidcRefreshRequest(). We use the proxy_ directives # to construct the OpenID Connect token request, as per: # https://openid.net/specs/openid-connect-core-1_0.html#RefreshingAccessToken internal; gunzip on; # Decompress if necessary proxy_set_header Content-Type "application/x-www-form-urlencoded"; proxy_method POST; proxy_set_body "grant_type=refresh_token&refresh_token=$arg_token&client_id=$oidc_client&client_secret=$oidc_client_secret"; proxy_pass $oidc_token_endpoint; error_log /var/log/nginx/oidc_error.log debug; } location = /_id_token_validation { ### 子请求获得返回的id token,要对它做一个验证,这里用njs的子请求来对token进行验证,成功返回204,失败返回403 # This location is called by oidcCodeExchange() and oidcRefreshRequest(). We use # the auth_jwt_module to validate the OpenID Connect token response, as per: # https://openid.net/specs/openid-connect-core-1_0.html#IDTokenValidation internal; auth_jwt "" token=$arg_token; js_content validateIdToken; ##这里应该写错了,应该是403错误捕捉 error_page 500 502 504 @oidc_error; error_log /var/log/nginx/oidc_error.log debug; } ###如果应用退出,清理token,让此下次继续认证 location = /logout { set $session_jwt -; # Clear tokens from keyval, set to - to indicate logout, set $refresh_token -; # and so that the new value is propagated by zone_sync. add_header Set-Cookie "auth_token=; Path=/; HttpOnly;"; # Send empty cookie add_header Set-Cookie "auth_redir=; Path=/; HttpOnly;"; # Erase original cookie return 302 $oidc_logout_redirect; } location = /_logout { # This location is the default value of $oidc_logout_redirect (in case it wasn't configured) default_type text/plain; return 200 "Logged out\n"; } location @oidc_error { # This location is called when oidcCodeExchange() or oidcRefreshRequest() returns an error default_type text/plain; return 500 "NGINX / OpenID Connect login failure\n"; } |
具体接js文件访问这里https://github.com/nginxinc/nginx-openid-connect/blob/R20/openid_connect.js
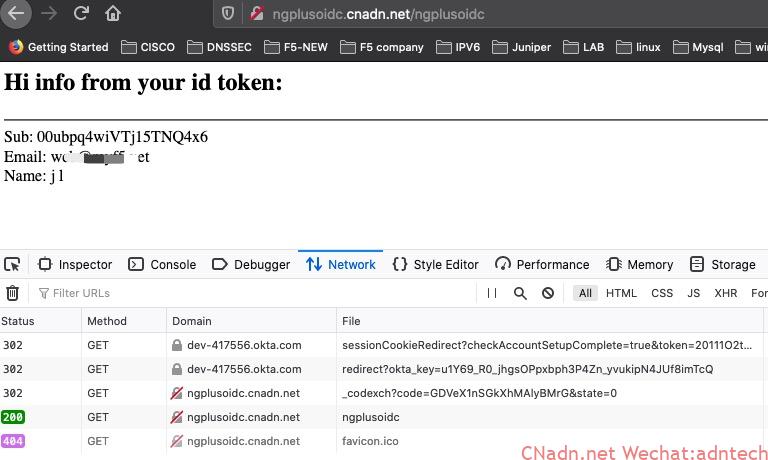
验证结果
附: OKTA申请APP过程
1.访问https://developer.okta.com/ 申请开发者账号
2.激活账号登录成功后,在界面增加一个app,类型选择web
3.参考如下填写信息,更换为你的实际域名
4. 自动配置发现接口地址是 https://dev-yourid.okta.com/oauth2/default/.well-known/oauth-authorization-server 这个地址可以看到相关endpoint信息
其它参考
https://developer.okta.com/code/dotnet/jwt-validation/
https://developer.okta.com/docs/reference/api/oidc/
默认配置下返回的id token,payload包含类似:
|
1 2 3 4 5 6 7 8 9 10 11 12 13 14 15 16 17 18 19 |
{ "sub": "00ubp*********j15TNQ4x6", "name": "j l", "email": "mail@myf5.net", "ver": 1, "iss": "https://dev-4****6.okta.com/oauth2/default", "aud": "0oab****&*&*&nvdB4x6", "iat": 1589120839, "exp": 1589124439, "jti": "ID.b8CCESWi7*&(……*……()&&&jYsFHNw", "amr": [ "pwd" ], "idp": "00obpq(*&(*&(&(&dth4x6", "nonce": "YXMFwQ*&%(*%……(*……(……(*……5LfMmW-nbMQ8", "preferred_username": "mail@myf5.net", "auth_time": 1589120833, "at_hash": "CL3qMZhb1EBXN5kJ3Wigew" } |
总结
在本篇中,我们采用了NGINX Plus直接实现OIDC的验证过程,利用njs的子请求特性和简便的编程能力快速的扩展,从而实现了NGINX直接作为client角色(第三方应用代理角色)在整个authorization code通信模型中的工作。通过JWT模块实现对获取的id token进行验证。使用keyval模块以及cache功能存储和加速ID token的处理。 那么如果在oAuth的 implicit模式下,NGINX能做什么呢? 请继续看本系列的第三篇。


文章评论